
Overview
Magexchat is a multi-agent WhatsApp chat plugin for WordPress that connects visitors with the most relevant support agent. You create and manage several WhatsApp agents and show them in a floating widget or as chat buttons, with full control over where and when the chat appears. In the WordPress admin the plugin's menu is called Smart WP Chat.
Each agent has its own details, such as department, availability schedule, greeting message and offline message. The plugin suits businesses, service providers and online stores that want a simple way to talk to customers on WhatsApp and answer faster, without an external chat platform. It follows WordPress coding standards and works with most themes and common plugins, including WooCommerce.
Key features
- Floating WhatsApp chat widget that stays visible while visitors browse, on the left or right of the screen
- Multiple WhatsApp agents managed from the WordPress admin, so visitors can choose who to contact
- Agent availability and offline handling: a schedule per agent, with an optional message when the agent is offline
- Agent details: department, greeting message, profile image and WhatsApp number for each agent
- Customisable design of the widget and buttons: text, label, icon, shape and colours
- Page-level visibility: show or hide the widget on specific pages, posts or custom post types
- Desktop and mobile settings: show the widget on desktop, mobile or both
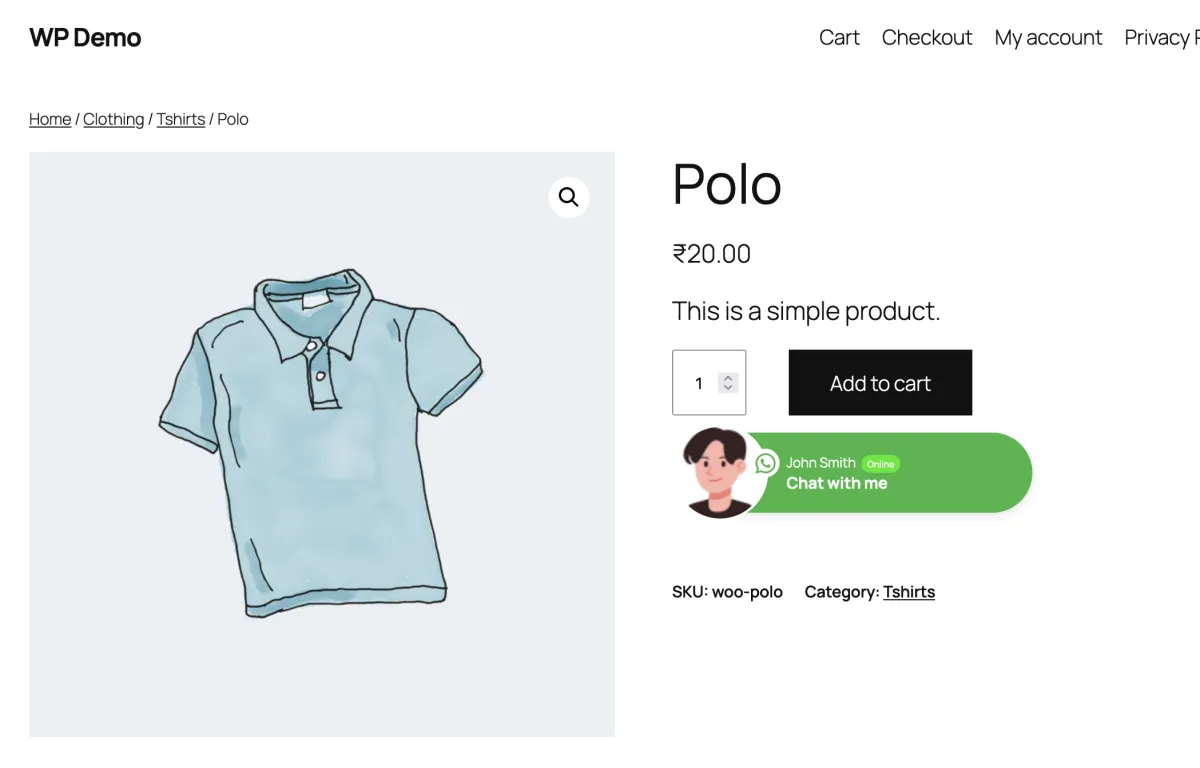
- WooCommerce integration: contact buttons on product pages
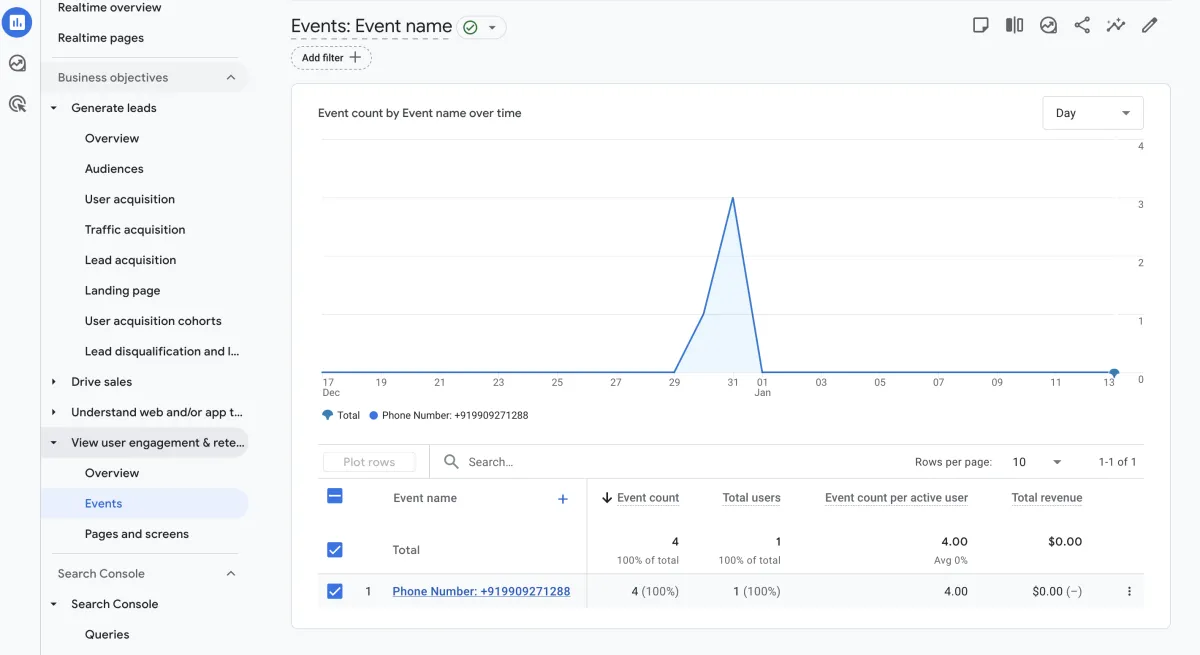
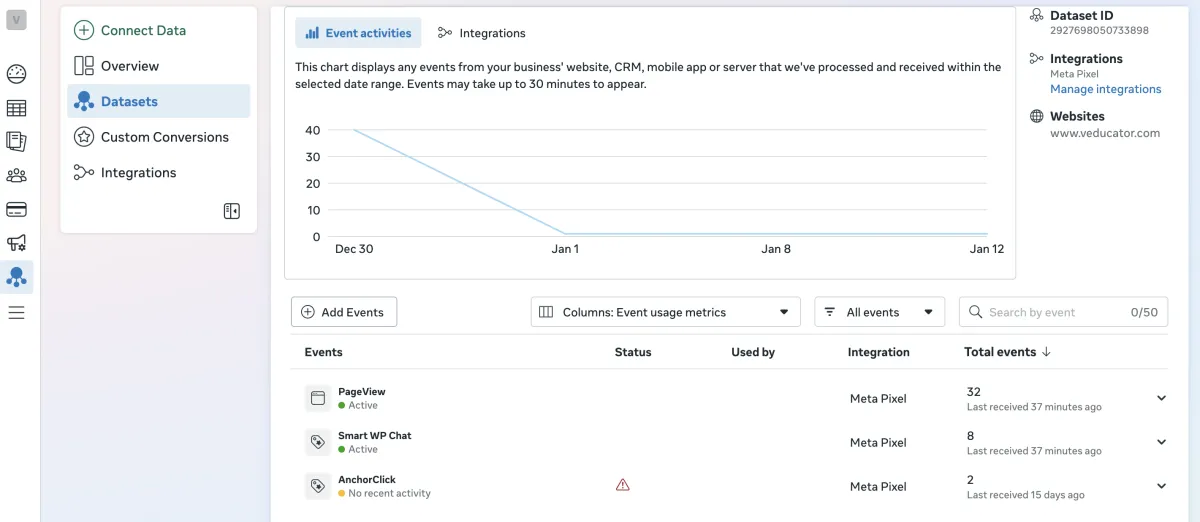
- Analytics and event tracking with Google Analytics and Facebook Pixel
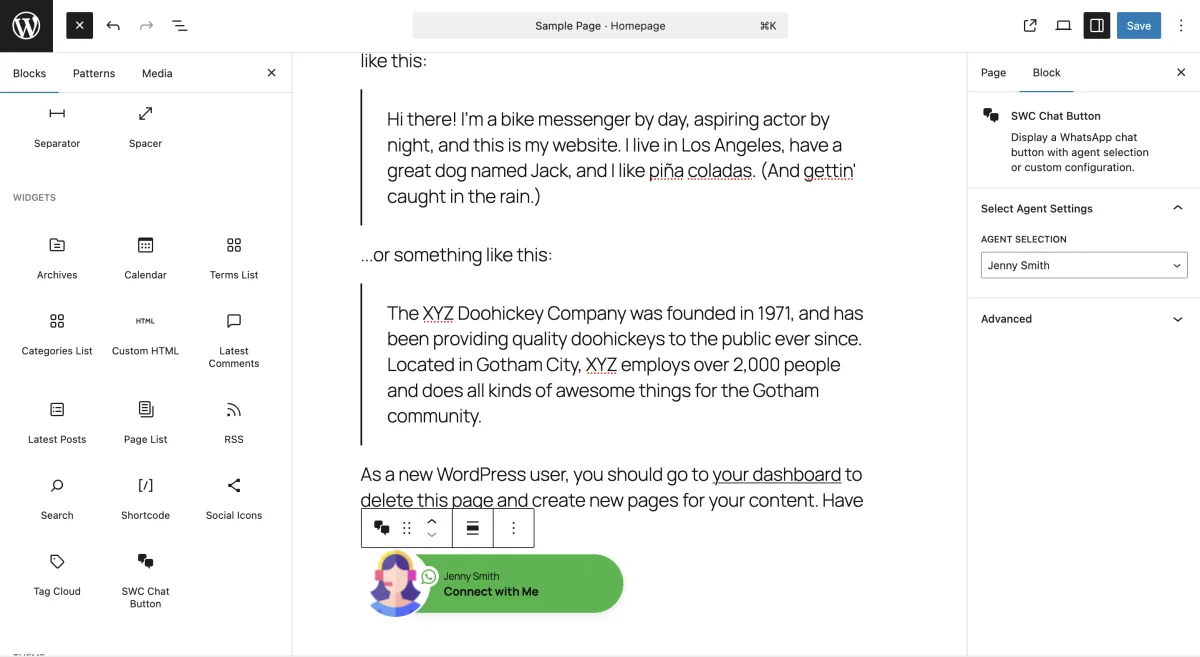
- Gutenberg block and shortcode to place chat buttons anywhere in your content
- Developer hooks and filters to extend the plugin without changing its files
- Translation ready, with translations including English, Spanish, French, German, Italian, Portuguese and Russian
Requirements
| Item | Version |
|---|---|
| WordPress | 5.8 or later |
| PHP | 7.4 or later |
| Database | MySQL 5.6+ or MariaDB 10.1+ |
| HTTPS | Recommended |
| WooCommerce | Optional (needed for the WooCommerce features) |
Installation and updates
Install the plugin
- Go to Plugins → Add New.
- Click Upload Plugin.
- Upload the ZIP file.
- Click Install Now, then Activate.
Update the plugin
- Back up your site.
- Deactivate the old version.
- Upload the new ZIP file.
- Activate the plugin.
Plugin settings are kept during updates.
WhatsApp agents
All WA Agents
Manage all WhatsApp agents in one place: see each agent's name, WhatsApp number or chat URL, and the agent's button shortcode.
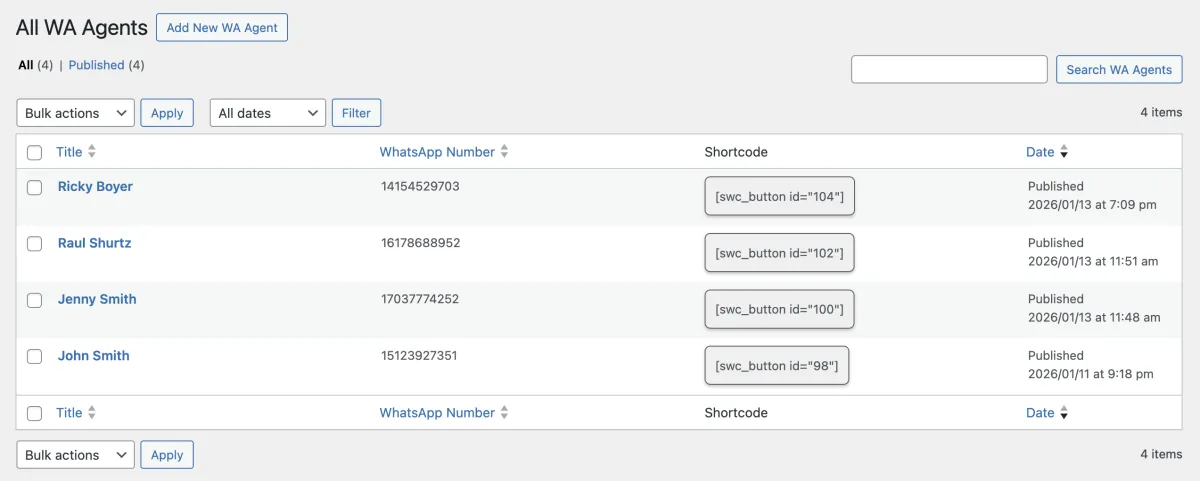
Add a WA agent
Create an agent for the floating widget or for an individual chat button. Go to All WA Agents → Add New WA Agent and fill in the fields below.
Agent information
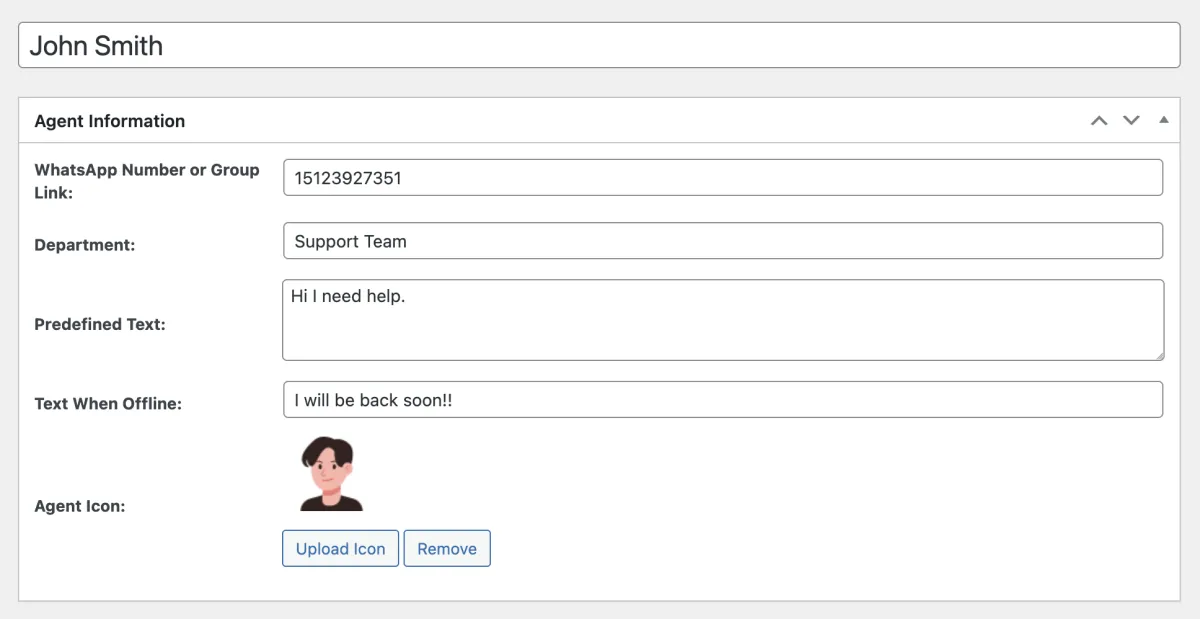
| Field | Description |
|---|---|
| Agent Name | The agent's display name. |
| WhatsApp Number or Group Link | The WhatsApp number in international format, or a WhatsApp group link, e.g. 1234567890 or https://chat.whatsapp.com/GroupLink. |
| Department | The agent's department, e.g. Support Team or Technical Team. |
| Predefined Text | A message filled in when a visitor chooses this agent. |
| Text When Offline | A message shown when the agent is offline. |
| Avatar Icon | An avatar image for the agent. |
Agent time availability
Set when the agent can receive messages. The plugin uses this to show the agent as online or offline in the floating widget. Times follow the WordPress time zone in Settings > General > Timezone.
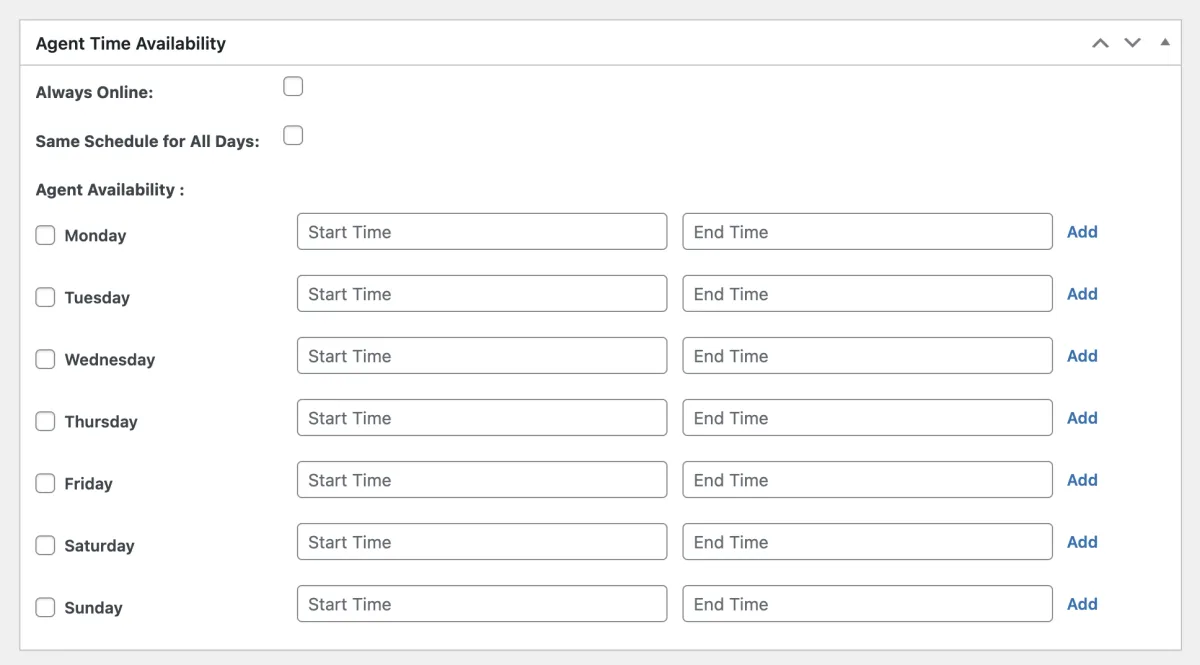
| Field | Description |
|---|---|
| Always Online | The agent always shows as online. |
| Same Schedule for All Days | One schedule (start and end time) for every day. Click Add for more time slots. |
| Agent Availability | Different start and end times for each day of the week, with more than one slot per day if needed (click Add). |
Button style
The look of the agent's chat button, used where the agent's button shortcode is placed.
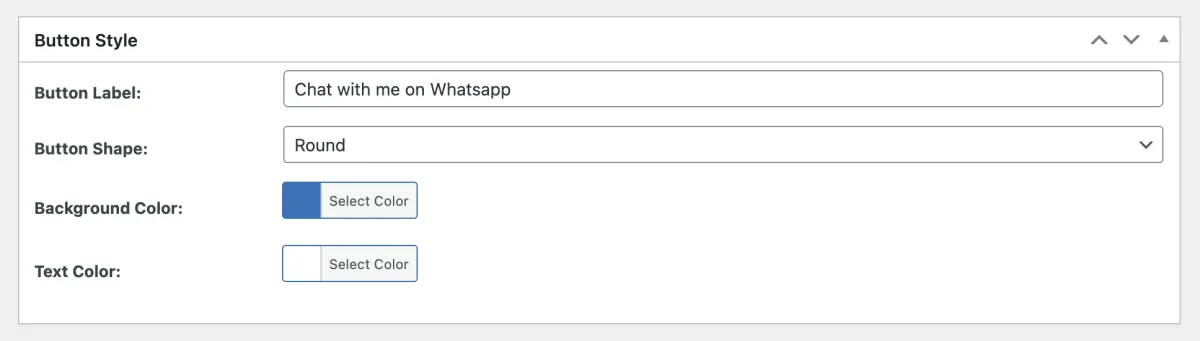
| Field | Description |
|---|---|
| Button Label | The text on the chat button. |
| Button Shape | The shape of the button (e.g. square or circle). |
| Background Color | The button's background colour. |
| Text Color | The button's text colour. |
Floating widget
The floating widget is the main way visitors start a WhatsApp conversation. Once configured, it shows as a floating button on every page and stays visible while visitors scroll. Go to Smart WP Chat → Floating Widget.
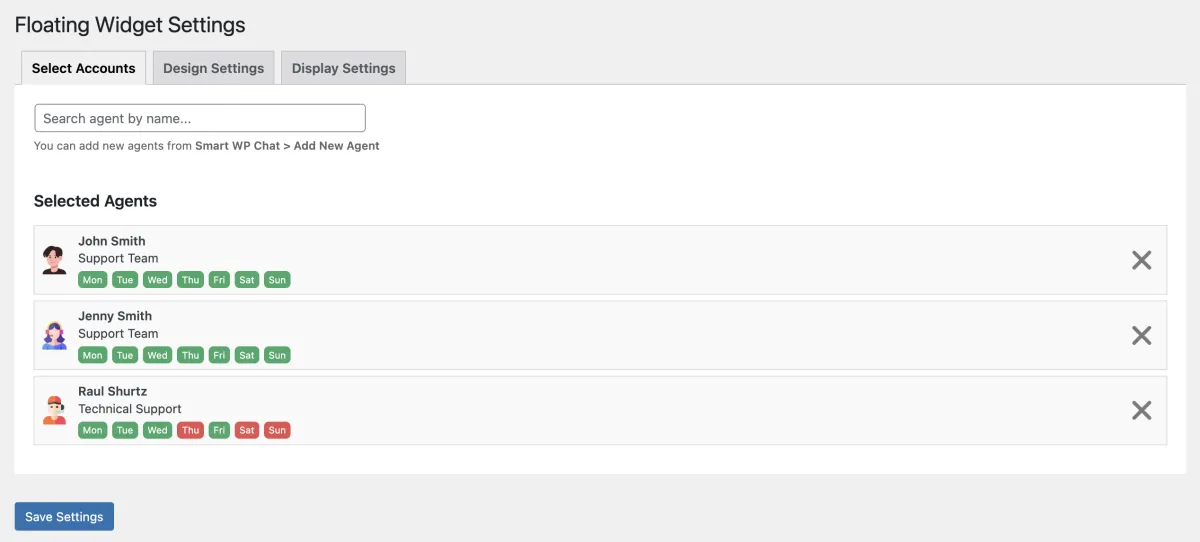
Select agents
Choose the agents shown in the floating widget: type at least two letters of a name in Search agent by name, then click the agent in the list. Add new agents from Smart WP Chat → Add New Agent.
Design settings
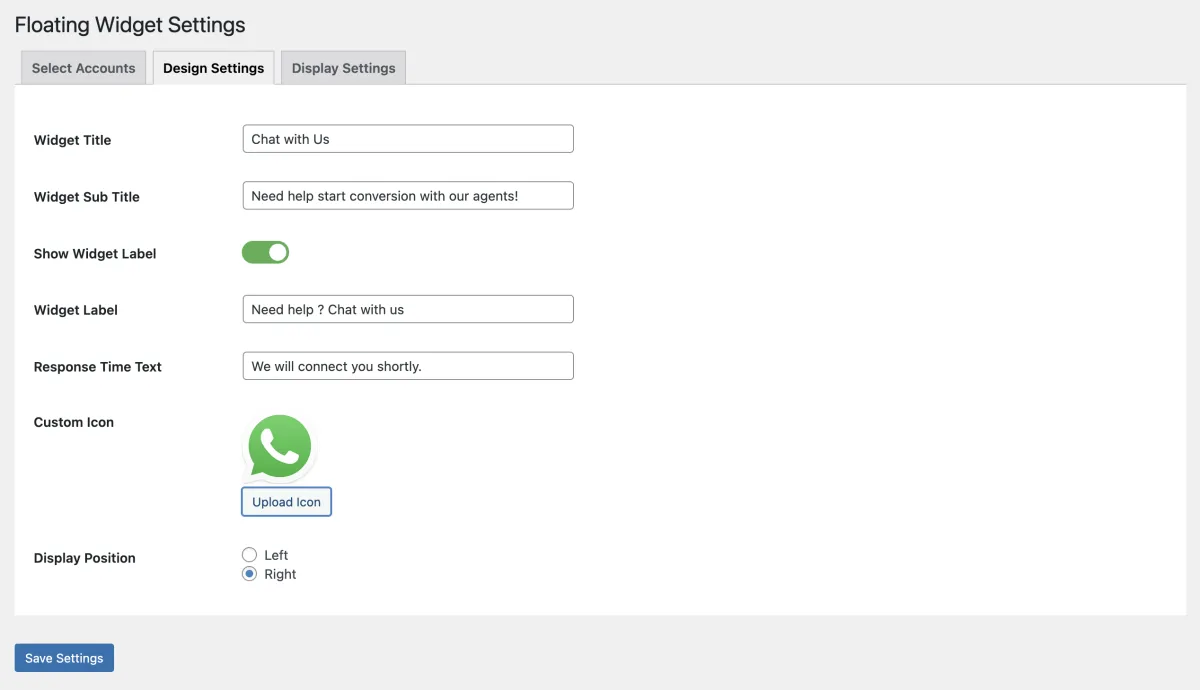
| Field | Description |
|---|---|
| Widget Title | Shown in the header of the widget box. |
| Widget Sub Title | Shown in the header after the title. |
| Show Widget Label | Shows or hides the label (tooltip) next to the floating icon. |
| Widget Label | The label text. Only used when Show Widget Label is on. |
| Response Time Text | Shown above the agent list in the widget box. |
| Custom Icon | Shown in the widget header and on the floating icon. A filter lets you use different icons for the two; see Developer hooks. |
| Display Position | Left or right of the screen. |
Display settings
Control where and when the floating widget appears.
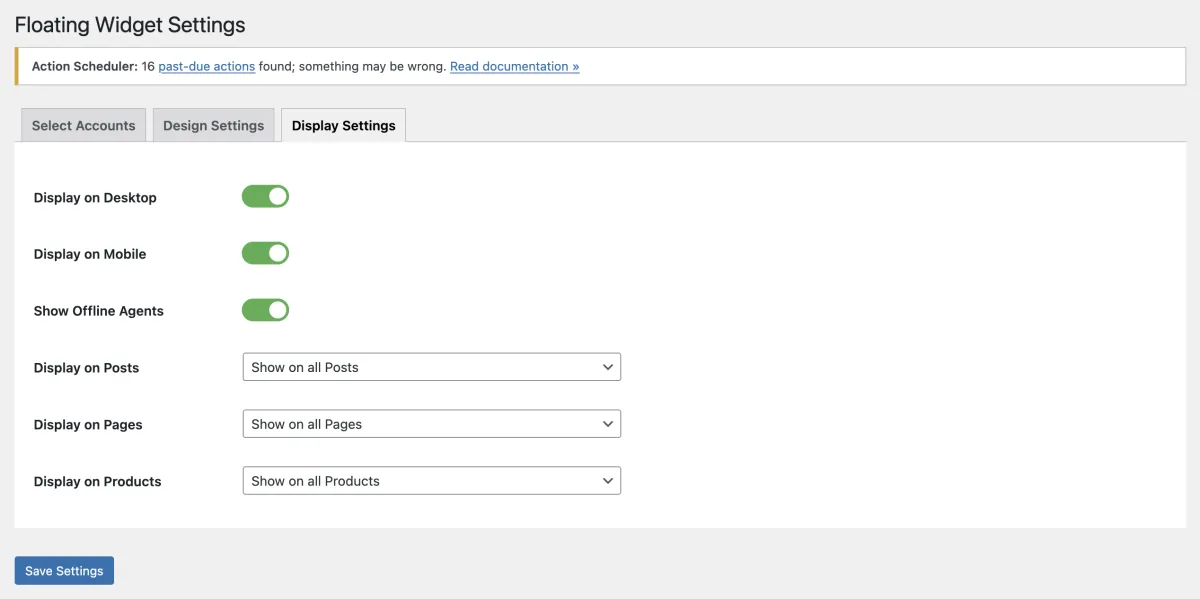
| Field | Description |
|---|---|
| Enable on Desktop | Shows or hides the widget on desktop devices. |
| Enable on Mobile | Shows or hides the widget on mobile devices. |
| Display on Posts | Show on all posts (default), Show on these posts or Hide on these posts. The last two add a Selected Posts field where you choose the posts. |
| Display on Pages | Show on all pages (default), Show on these pages or Hide on these pages, with a Selected Pages field. |
| Display on Products | Show on all products (default), Show on these products or Hide on these products, with a Selected Products field. Only when WooCommerce is installed and active. |
Note: the widget also shows on any other custom post types by default. To give them the same display options, use the swc_allowed_visibility_post_types filter (see Developer hooks).
Settings
WooCommerce
Show contact buttons on WooCommerce product pages: go to Smart WP Chat > Settings > WooCommerce. Only available when WooCommerce is installed and active.
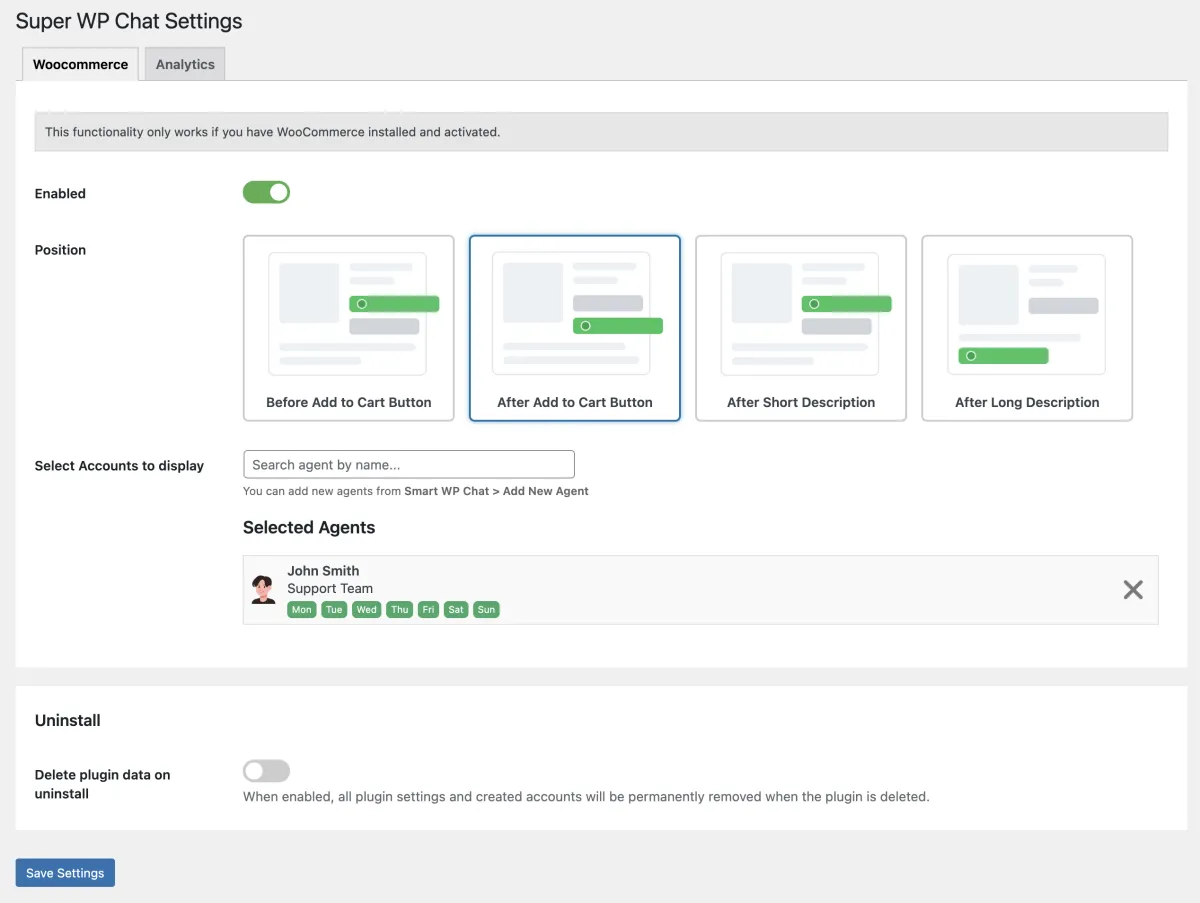
| Field | Description |
|---|---|
| Enabled | Turns the WooCommerce integration on or off. |
| Position | Where the contact buttons appear on product pages: Before Add to Cart Button, After Add to Cart Button, After Short Description or After Long Description. |
| Select Accounts to Display | The agents shown as contact buttons on product pages. Type at least two letters of a name in Search agent by name, then click the agent. |
Analytics
Track WhatsApp button clicks with Google Analytics (GA and GA4) and Facebook Pixel. This works when Google Analytics and the Pixel are already set up on your site.
- Enabled Google Analytics: turns Google Analytics tracking on or off.
- Enabled Facebook Pixel: turns Facebook Pixel tracking on or off.
Shortcode and Gutenberg block
Shortcode
Show an agent's WhatsApp button anywhere with its shortcode, for example [swc_button id="12"] shows the button of the agent with ID 12. Each agent's shortcode is listed in All WA Agents.
Gutenberg block
Add the SWC Chat Button block anywhere in the block editor. Choose an agent in the Select Agent list, or choose Custom Button to enter your own details.
Developer hooks
Extend the plugin with WordPress actions and filters, without changing its files.
Actions
| Hook | Runs |
|---|---|
swc_pro_before_chat_agent_list | Before the agent list in the floating widget |
swc_pro_before_chat_agent | Before each agent in the floating widget (receives the agent ID) |
swc_pro_after_chat_agent | After each agent in the floating widget (receives the agent ID) |
swc_pro_after_chat_agent_list | After the full agent list in the floating widget |
swc_pro_before_woocommerce_chat_button | Before a WooCommerce chat button on product pages |
swc_pro_after_woocommerce_chat_button | After a WooCommerce chat button on product pages |
Filters
| Filter | Changes |
|---|---|
swc_pro_agent_info_metabox_title | Title of the Agent Information box |
swc_pro_agent_timing_metabox_title | Title of the Agent Time Availability box |
swc_pro_button_style_metabox_title | Title of the Button Style box |
swc_pro_agent_availability_meta_values | An agent's availability data before the availability box is shown (receives the data and the post) |
swc_pro_agent_post_type_args | The registration arguments of the WhatsApp agent post type |
swc_pro_default_agent_avatar | The default avatar URL for agents without their own |
swc_pro_woocommerce_exclude_agent_by_sku | Whether to hide an agent on a WooCommerce product page, e.g. by SKU or category (return true to hide) |
swc_allowed_visibility_post_types | The post types that get the display settings |
swc_pro_agent_online_status | An agent's online status (receives the status and agent ID), e.g. to force offline on holidays or read availability from a CRM |
Example: rename the Agent Information box.
add_filter( 'swc_pro_agent_info_metabox_title', 'my_custom_metabox_title' );
function my_custom_metabox_title( $title ) {
    return 'Agent Details & Contact Information';
}
Changelog
1.0.0: initial release with multi-agent WhatsApp support, the floating widget, WooCommerce integration, analytics tracking and the Gutenberg block.
Support
Support is by email: write to info@magexweb.com with as much detail about the issue as you can.